By Janne Lahtela
LET’S GET STARTED!
Let’s start by creating variables for the remote control key codes in our app.js file.
					/**
 * A remote control key variables
 */
let RC_LEFT,RC_UP,RC_RIGHT,RC_DOWN,RC_ENTER,RC_BACK,RC_EXIT;
These are so that we don’t have to remember what the key codes are later, we just have to remember the variable names.
Next, it’s good to define and store our root element in the application when the application is created.
					/**
 * The root html element
 */
let root = null;
We will probably have to refer to this at some point when we write our application.
After these, we start creating essential functions for our application, and one of those functions is something which sets the key variable values that we defined earlier. Let’s call it the registerKeys function.
					/**
 * Setting key event numeric value to variables so you don't have to numeric values
 */
function registerKeys() {
  console.log("registerKeys is called");
  RC_LEFT = 37;
  RC_UP = 38;
  RC_RIGHT = 39;
  RC_DOWN = 40;
  RC_ENTER = 13;
  RC_BACK = 10009;
  RC_EXIT = 10182;
}
The numeric value here is the code for the key. For example, the Enter key on your keyboard is the same as the Enter key on the remote control. You can find these values on the web or catch them in the application.
At this point, it might be good to define the functions for the key presses before we start combining everything into application form.
/**
* The key press functions
*/
function keyPressUp() {
console.log("You pressed the up key");
root.innerHTML = "UP";
}
function keyPressDown() {
console.log("You pressed the down key");
root.innerHTML = "DOWN";
}
function keyPressLeft() {
console.log("You pressed the left key");
root.innerHTML = "LEFT";
}
function keyPressRight() {
console.log("You pressed the right key");
root.innerHTML = "RIGHT";
}
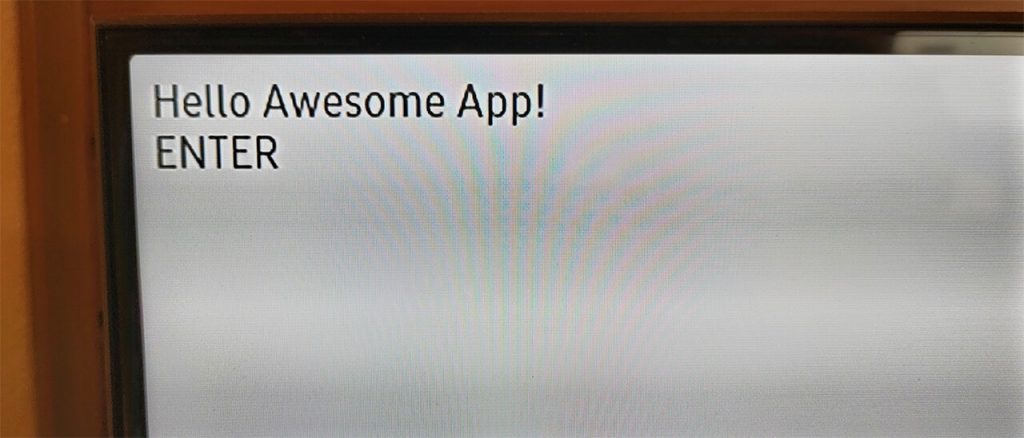
function selectItem() {
console.log("You pressed the enter key");
root.innerHTML = "ENTER";
}
Nothing too fancy here. As you can see, we’re calling the root element here, so we have to define the element before the application is ready for use. In this simple example, we put the text, e.g. “ENTER”, inside the root element.
Good. Now we have the key codes set and the functions for them. The next step would be something that defines what we do when a key on the remote control is pressed. A switch-case is a good and easy way to separate the keys pressed.
					/**
 * Function which is called when a key is pressed
 */
function handleKeyPress(event) {
  switch(event.keyCode) {
    case RC_ENTER:
      selectItem();
      break;
    case RC_EXIT:
      break;
    case RC_LEFT:
      keyPressLeft();
      break;
    case RC_RIGHT:
      keyPressRight();
      break;
    case RC_UP:
      keyPressUp();
      break;
    case RC_DOWN:
      keyPressDown();
      break;
    default:
      console.log("You need to add some cases here, a key you pressed was", event.keyCode);
  }
}
When a key is pressed, the switch-case catches the value and executes the case based on that value. The default at the end of the switch-case cases catches the value if it’s not defined yet.
Now we have all the components for the perfect application where key presses are handled. Let’s put everything together and create the app here.
					/**
 * Function for creating the application and getting it ready for the users to use
 */
function createApp() {
  console.log("Creating the app...");

  registerKeys();

  /**
   * Setting the root HTML element
  */
  root = document.getElementById("app");

  document.addEventListener("keydown", handleKeyPress);

  /**
   * Here you can start doing awesome things!
   */
  console.log("...and it's ready for use");
}
First, we register all the key event codes. After that, we tell the application what our root element is on the index page. Finally, we create an event listener and bind our function which handles the key presses.
If you want to check how your app.js file should look like, check here: download app.js
Now it’s time for the changes in index.html, and because we are creating a larger application, let’s organize the files a bit. Let’s move our app.js to a new “js” folder because it’s possible that we’ll need more JavaScript files in the future.
					<!DOCTYPE html>
<html>
    <head>
        <meta charset="UTF-8">
        <title>My Awesome Smart-TV -app!</title>
        <link rel="stylesheet" type="text/css" href="./css/styles.css" />
        <script type="text/javascript" language="javascript">
            document.addEventListener("DOMContentLoaded", function(event) {
                createApp();
            });
        </script>
        <script src="./js/app.js"></script>
    <style id="wpr-lazyload-bg-container"></style><style id="wpr-lazyload-bg-exclusion"></style>
<noscript>
<style id="wpr-lazyload-bg-nostyle">.dlm-filetype-pdf{--wpr-bg-604346db-9c6f-4e94-9eb7-ae0a172ed446: url('https://sofiadigital.com/wp-content/plugins/download-monitor/assets/images/filetypes/document-pdf.png');}.dlm-filetype-aif,.dlm-filetype-aifc,.dlm-filetype-aiff,.dlm-filetype-au,.dlm-filetype-kar,.dlm-filetype-m3u,.dlm-filetype-m4r,.dlm-filetype-mid,.dlm-filetype-midi,.dlm-filetype-mp2,.dlm-filetype-mp3,.dlm-filetype-mpga,.dlm-filetype-ra,.dlm-filetype-ram,.dlm-filetype-rm,.dlm-filetype-rpm,.dlm-filetype-snd,.dlm-filetype-wav,.dlm-filetype-wave{--wpr-bg-b03c1013-e560-42d8-81f1-0a7c72237cb0: url('https://sofiadigital.com/wp-content/plugins/download-monitor/assets/images/filetypes/document-music.png');}.dlm-filetype-avi,.dlm-filetype-divx,.dlm-filetype-mov,.dlm-filetype-movie,.dlm-filetype-mp4,.dlm-filetype-mpe,.dlm-filetype-mpeg,.dlm-filetype-mpg,.dlm-filetype-mxu,.dlm-filetype-qt,.dlm-filetype-wmv{--wpr-bg-2db0a864-92c4-4a48-92d6-a754b0be8f3d: url('https://sofiadigital.com/wp-content/plugins/download-monitor/assets/images/filetypes/document-film.png');}.dlm-filetype-7z,.dlm-filetype-gz,.dlm-filetype-rar,.dlm-filetype-sit,.dlm-filetype-tar,.dlm-filetype-zip{--wpr-bg-1e8a55f8-87d3-4ca3-9cd3-4432f6a81a64: url('https://sofiadigital.com/wp-content/plugins/download-monitor/assets/images/filetypes/document-zipper.png');}.dlm-filetype-csv,.dlm-filetype-tsv,.dlm-filetype-xls,.dlm-filetype-xlsx{--wpr-bg-f89ba88f-0c12-4e69-bbb8-dff872ff667e: url('https://sofiadigital.com/wp-content/plugins/download-monitor/assets/images/filetypes/document-excel.png');}.dlm-filetype-doc,.dlm-filetype-docx{--wpr-bg-746d5b90-5a11-4400-a6c1-7f4a05317428: url('https://sofiadigital.com/wp-content/plugins/download-monitor/assets/images/filetypes/document-word-text.png');}.dlm-filetype-ai{--wpr-bg-9f55ac9c-ba5f-4e2a-a57f-7f724e408784: url('https://sofiadigital.com/wp-content/plugins/download-monitor/assets/images/filetypes/document-illustrator.png');}.dlm-filetype-swf{--wpr-bg-3e61f331-6956-4882-b671-3b92886e059a: url('https://sofiadigital.com/wp-content/plugins/download-monitor/assets/images/filetypes/document-flash-movie.png');}.dlm-filetype-bmp,.dlm-filetype-djv,.dlm-filetype-eps,.dlm-filetype-gif,.dlm-filetype-ief,.dlm-filetype-jpe,.dlm-filetype-jpeg,.dlm-filetype-jpg,.dlm-filetype-pbm,.dlm-filetype-pgm,.dlm-filetype-png,.dlm-filetype-pnm,.dlm-filetype-ppm,.dlm-filetype-ps,.dlm-filetype-ras,.dlm-filetype-rgb,.dlm-filetype-tif,.dlm-filetype-tiff,.dlm-filetype-wbmp,.dlm-filetype-xbm,.dlm-filetype-xpm,.dlm-filetype-xwd{--wpr-bg-90cd1d0d-d46a-45a1-b763-2812e8e03591: url('https://sofiadigital.com/wp-content/plugins/download-monitor/assets/images/filetypes/document-image.png');}.dlm-filetype-psd{--wpr-bg-2248be81-a823-45c8-8b7c-18db53289420: url('https://sofiadigital.com/wp-content/plugins/download-monitor/assets/images/filetypes/document-photoshop.png');}.dlm-filetype-ppt,.dlm-filetype-pptx{--wpr-bg-5c5a466d-8296-4cca-96e6-e1c87ad18674: url('https://sofiadigital.com/wp-content/plugins/download-monitor/assets/images/filetypes/document-powerpoint.png');}.dlm-filetype-as,.dlm-filetype-css,.dlm-filetype-htaccess,.dlm-filetype-htm,.dlm-filetype-html,.dlm-filetype-js,.dlm-filetype-php,.dlm-filetype-sql,.dlm-filetype-xml,.dlm-filetype-xsl{--wpr-bg-276272f4-a08b-4552-ba2a-e40591e252e3: url('https://sofiadigital.com/wp-content/plugins/download-monitor/assets/images/filetypes/document-code.png');}.dlm-filetype-rtf,.dlm-filetype-rtx{--wpr-bg-3de20c92-fd60-43bd-9f6f-0f006ff025e5: url('https://sofiadigital.com/wp-content/plugins/download-monitor/assets/images/filetypes/document-text-image.png');}.dlm-filetype-txt{--wpr-bg-52bf805c-9de2-40c0-8542-1ce6d32e429c: url('https://sofiadigital.com/wp-content/plugins/download-monitor/assets/images/filetypes/document-text.png');}.arrow-button .elementor-button-link:after{--wpr-bg-4ee7c309-6c64-44fa-95f8-5082d0469984: url('https://sofiadigital.com/wp-content/uploads/2022/06/sofia-orange-arrow-right.svg');}.current-read-more a:after{--wpr-bg-cb3406c3-b3d8-4b94-bc47-da9c09b37154: url('https://sofiadigital.com/wp-content/uploads/2022/06/sofia-orange-arrow-right.svg');}.elementor-post__read-more:after{--wpr-bg-be8f777a-14a7-4b50-9a14-b6e4f94e922f: url('https://sofiadigital.com/wp-content/uploads/2022/06/sofia-orange-arrow-right.svg');}.offering-grid-read-more a:after{--wpr-bg-aebb1626-6cd6-49e6-80cc-1cb5cf1eb4d4: url('https://sofiadigital.com/wp-content/uploads/2022/06/sofia-orange-arrow-right.svg');}.elementor-6248 .elementor-element.elementor-element-7472d45e:not(.elementor-motion-effects-element-type-background), .elementor-6248 .elementor-element.elementor-element-7472d45e > .elementor-motion-effects-container > .elementor-motion-effects-layer{--wpr-bg-975b2032-8c84-46b2-ad5d-b079a9a51fc0: url('https://sofiadigital.com/wp-content/uploads/2022/06/sd_oranssibg_kuvituksella.jpg');}</style>
</noscript>
<script type="application/javascript">const rocket_pairs = [{"selector":".dlm-filetype-pdf","style":".dlm-filetype-pdf{--wpr-bg-604346db-9c6f-4e94-9eb7-ae0a172ed446: url('https:\/\/sofiadigital.com\/wp-content\/plugins\/download-monitor\/assets\/images\/filetypes\/document-pdf.png');}","hash":"604346db-9c6f-4e94-9eb7-ae0a172ed446","url":"https:\/\/sofiadigital.com\/wp-content\/plugins\/download-monitor\/assets\/images\/filetypes\/document-pdf.png"},{"selector":".dlm-filetype-aif,.dlm-filetype-aifc,.dlm-filetype-aiff,.dlm-filetype-au,.dlm-filetype-kar,.dlm-filetype-m3u,.dlm-filetype-m4r,.dlm-filetype-mid,.dlm-filetype-midi,.dlm-filetype-mp2,.dlm-filetype-mp3,.dlm-filetype-mpga,.dlm-filetype-ra,.dlm-filetype-ram,.dlm-filetype-rm,.dlm-filetype-rpm,.dlm-filetype-snd,.dlm-filetype-wav,.dlm-filetype-wave","style":".dlm-filetype-aif,.dlm-filetype-aifc,.dlm-filetype-aiff,.dlm-filetype-au,.dlm-filetype-kar,.dlm-filetype-m3u,.dlm-filetype-m4r,.dlm-filetype-mid,.dlm-filetype-midi,.dlm-filetype-mp2,.dlm-filetype-mp3,.dlm-filetype-mpga,.dlm-filetype-ra,.dlm-filetype-ram,.dlm-filetype-rm,.dlm-filetype-rpm,.dlm-filetype-snd,.dlm-filetype-wav,.dlm-filetype-wave{--wpr-bg-b03c1013-e560-42d8-81f1-0a7c72237cb0: url('https:\/\/sofiadigital.com\/wp-content\/plugins\/download-monitor\/assets\/images\/filetypes\/document-music.png');}","hash":"b03c1013-e560-42d8-81f1-0a7c72237cb0","url":"https:\/\/sofiadigital.com\/wp-content\/plugins\/download-monitor\/assets\/images\/filetypes\/document-music.png"},{"selector":".dlm-filetype-avi,.dlm-filetype-divx,.dlm-filetype-mov,.dlm-filetype-movie,.dlm-filetype-mp4,.dlm-filetype-mpe,.dlm-filetype-mpeg,.dlm-filetype-mpg,.dlm-filetype-mxu,.dlm-filetype-qt,.dlm-filetype-wmv","style":".dlm-filetype-avi,.dlm-filetype-divx,.dlm-filetype-mov,.dlm-filetype-movie,.dlm-filetype-mp4,.dlm-filetype-mpe,.dlm-filetype-mpeg,.dlm-filetype-mpg,.dlm-filetype-mxu,.dlm-filetype-qt,.dlm-filetype-wmv{--wpr-bg-2db0a864-92c4-4a48-92d6-a754b0be8f3d: url('https:\/\/sofiadigital.com\/wp-content\/plugins\/download-monitor\/assets\/images\/filetypes\/document-film.png');}","hash":"2db0a864-92c4-4a48-92d6-a754b0be8f3d","url":"https:\/\/sofiadigital.com\/wp-content\/plugins\/download-monitor\/assets\/images\/filetypes\/document-film.png"},{"selector":".dlm-filetype-7z,.dlm-filetype-gz,.dlm-filetype-rar,.dlm-filetype-sit,.dlm-filetype-tar,.dlm-filetype-zip","style":".dlm-filetype-7z,.dlm-filetype-gz,.dlm-filetype-rar,.dlm-filetype-sit,.dlm-filetype-tar,.dlm-filetype-zip{--wpr-bg-1e8a55f8-87d3-4ca3-9cd3-4432f6a81a64: url('https:\/\/sofiadigital.com\/wp-content\/plugins\/download-monitor\/assets\/images\/filetypes\/document-zipper.png');}","hash":"1e8a55f8-87d3-4ca3-9cd3-4432f6a81a64","url":"https:\/\/sofiadigital.com\/wp-content\/plugins\/download-monitor\/assets\/images\/filetypes\/document-zipper.png"},{"selector":".dlm-filetype-csv,.dlm-filetype-tsv,.dlm-filetype-xls,.dlm-filetype-xlsx","style":".dlm-filetype-csv,.dlm-filetype-tsv,.dlm-filetype-xls,.dlm-filetype-xlsx{--wpr-bg-f89ba88f-0c12-4e69-bbb8-dff872ff667e: url('https:\/\/sofiadigital.com\/wp-content\/plugins\/download-monitor\/assets\/images\/filetypes\/document-excel.png');}","hash":"f89ba88f-0c12-4e69-bbb8-dff872ff667e","url":"https:\/\/sofiadigital.com\/wp-content\/plugins\/download-monitor\/assets\/images\/filetypes\/document-excel.png"},{"selector":".dlm-filetype-doc,.dlm-filetype-docx","style":".dlm-filetype-doc,.dlm-filetype-docx{--wpr-bg-746d5b90-5a11-4400-a6c1-7f4a05317428: url('https:\/\/sofiadigital.com\/wp-content\/plugins\/download-monitor\/assets\/images\/filetypes\/document-word-text.png');}","hash":"746d5b90-5a11-4400-a6c1-7f4a05317428","url":"https:\/\/sofiadigital.com\/wp-content\/plugins\/download-monitor\/assets\/images\/filetypes\/document-word-text.png"},{"selector":".dlm-filetype-ai","style":".dlm-filetype-ai{--wpr-bg-9f55ac9c-ba5f-4e2a-a57f-7f724e408784: url('https:\/\/sofiadigital.com\/wp-content\/plugins\/download-monitor\/assets\/images\/filetypes\/document-illustrator.png');}","hash":"9f55ac9c-ba5f-4e2a-a57f-7f724e408784","url":"https:\/\/sofiadigital.com\/wp-content\/plugins\/download-monitor\/assets\/images\/filetypes\/document-illustrator.png"},{"selector":".dlm-filetype-swf","style":".dlm-filetype-swf{--wpr-bg-3e61f331-6956-4882-b671-3b92886e059a: url('https:\/\/sofiadigital.com\/wp-content\/plugins\/download-monitor\/assets\/images\/filetypes\/document-flash-movie.png');}","hash":"3e61f331-6956-4882-b671-3b92886e059a","url":"https:\/\/sofiadigital.com\/wp-content\/plugins\/download-monitor\/assets\/images\/filetypes\/document-flash-movie.png"},{"selector":".dlm-filetype-bmp,.dlm-filetype-djv,.dlm-filetype-eps,.dlm-filetype-gif,.dlm-filetype-ief,.dlm-filetype-jpe,.dlm-filetype-jpeg,.dlm-filetype-jpg,.dlm-filetype-pbm,.dlm-filetype-pgm,.dlm-filetype-png,.dlm-filetype-pnm,.dlm-filetype-ppm,.dlm-filetype-ps,.dlm-filetype-ras,.dlm-filetype-rgb,.dlm-filetype-tif,.dlm-filetype-tiff,.dlm-filetype-wbmp,.dlm-filetype-xbm,.dlm-filetype-xpm,.dlm-filetype-xwd","style":".dlm-filetype-bmp,.dlm-filetype-djv,.dlm-filetype-eps,.dlm-filetype-gif,.dlm-filetype-ief,.dlm-filetype-jpe,.dlm-filetype-jpeg,.dlm-filetype-jpg,.dlm-filetype-pbm,.dlm-filetype-pgm,.dlm-filetype-png,.dlm-filetype-pnm,.dlm-filetype-ppm,.dlm-filetype-ps,.dlm-filetype-ras,.dlm-filetype-rgb,.dlm-filetype-tif,.dlm-filetype-tiff,.dlm-filetype-wbmp,.dlm-filetype-xbm,.dlm-filetype-xpm,.dlm-filetype-xwd{--wpr-bg-90cd1d0d-d46a-45a1-b763-2812e8e03591: url('https:\/\/sofiadigital.com\/wp-content\/plugins\/download-monitor\/assets\/images\/filetypes\/document-image.png');}","hash":"90cd1d0d-d46a-45a1-b763-2812e8e03591","url":"https:\/\/sofiadigital.com\/wp-content\/plugins\/download-monitor\/assets\/images\/filetypes\/document-image.png"},{"selector":".dlm-filetype-psd","style":".dlm-filetype-psd{--wpr-bg-2248be81-a823-45c8-8b7c-18db53289420: url('https:\/\/sofiadigital.com\/wp-content\/plugins\/download-monitor\/assets\/images\/filetypes\/document-photoshop.png');}","hash":"2248be81-a823-45c8-8b7c-18db53289420","url":"https:\/\/sofiadigital.com\/wp-content\/plugins\/download-monitor\/assets\/images\/filetypes\/document-photoshop.png"},{"selector":".dlm-filetype-ppt,.dlm-filetype-pptx","style":".dlm-filetype-ppt,.dlm-filetype-pptx{--wpr-bg-5c5a466d-8296-4cca-96e6-e1c87ad18674: url('https:\/\/sofiadigital.com\/wp-content\/plugins\/download-monitor\/assets\/images\/filetypes\/document-powerpoint.png');}","hash":"5c5a466d-8296-4cca-96e6-e1c87ad18674","url":"https:\/\/sofiadigital.com\/wp-content\/plugins\/download-monitor\/assets\/images\/filetypes\/document-powerpoint.png"},{"selector":".dlm-filetype-as,.dlm-filetype-css,.dlm-filetype-htaccess,.dlm-filetype-htm,.dlm-filetype-html,.dlm-filetype-js,.dlm-filetype-php,.dlm-filetype-sql,.dlm-filetype-xml,.dlm-filetype-xsl","style":".dlm-filetype-as,.dlm-filetype-css,.dlm-filetype-htaccess,.dlm-filetype-htm,.dlm-filetype-html,.dlm-filetype-js,.dlm-filetype-php,.dlm-filetype-sql,.dlm-filetype-xml,.dlm-filetype-xsl{--wpr-bg-276272f4-a08b-4552-ba2a-e40591e252e3: url('https:\/\/sofiadigital.com\/wp-content\/plugins\/download-monitor\/assets\/images\/filetypes\/document-code.png');}","hash":"276272f4-a08b-4552-ba2a-e40591e252e3","url":"https:\/\/sofiadigital.com\/wp-content\/plugins\/download-monitor\/assets\/images\/filetypes\/document-code.png"},{"selector":".dlm-filetype-rtf,.dlm-filetype-rtx","style":".dlm-filetype-rtf,.dlm-filetype-rtx{--wpr-bg-3de20c92-fd60-43bd-9f6f-0f006ff025e5: url('https:\/\/sofiadigital.com\/wp-content\/plugins\/download-monitor\/assets\/images\/filetypes\/document-text-image.png');}","hash":"3de20c92-fd60-43bd-9f6f-0f006ff025e5","url":"https:\/\/sofiadigital.com\/wp-content\/plugins\/download-monitor\/assets\/images\/filetypes\/document-text-image.png"},{"selector":".dlm-filetype-txt","style":".dlm-filetype-txt{--wpr-bg-52bf805c-9de2-40c0-8542-1ce6d32e429c: url('https:\/\/sofiadigital.com\/wp-content\/plugins\/download-monitor\/assets\/images\/filetypes\/document-text.png');}","hash":"52bf805c-9de2-40c0-8542-1ce6d32e429c","url":"https:\/\/sofiadigital.com\/wp-content\/plugins\/download-monitor\/assets\/images\/filetypes\/document-text.png"},{"selector":".arrow-button .elementor-button-link","style":".arrow-button .elementor-button-link:after{--wpr-bg-4ee7c309-6c64-44fa-95f8-5082d0469984: url('https:\/\/sofiadigital.com\/wp-content\/uploads\/2022\/06\/sofia-orange-arrow-right.svg');}","hash":"4ee7c309-6c64-44fa-95f8-5082d0469984","url":"https:\/\/sofiadigital.com\/wp-content\/uploads\/2022\/06\/sofia-orange-arrow-right.svg"},{"selector":".current-read-more a","style":".current-read-more a:after{--wpr-bg-cb3406c3-b3d8-4b94-bc47-da9c09b37154: url('https:\/\/sofiadigital.com\/wp-content\/uploads\/2022\/06\/sofia-orange-arrow-right.svg');}","hash":"cb3406c3-b3d8-4b94-bc47-da9c09b37154","url":"https:\/\/sofiadigital.com\/wp-content\/uploads\/2022\/06\/sofia-orange-arrow-right.svg"},{"selector":".elementor-post__read-more","style":".elementor-post__read-more:after{--wpr-bg-be8f777a-14a7-4b50-9a14-b6e4f94e922f: url('https:\/\/sofiadigital.com\/wp-content\/uploads\/2022\/06\/sofia-orange-arrow-right.svg');}","hash":"be8f777a-14a7-4b50-9a14-b6e4f94e922f","url":"https:\/\/sofiadigital.com\/wp-content\/uploads\/2022\/06\/sofia-orange-arrow-right.svg"},{"selector":".offering-grid-read-more a","style":".offering-grid-read-more a:after{--wpr-bg-aebb1626-6cd6-49e6-80cc-1cb5cf1eb4d4: url('https:\/\/sofiadigital.com\/wp-content\/uploads\/2022\/06\/sofia-orange-arrow-right.svg');}","hash":"aebb1626-6cd6-49e6-80cc-1cb5cf1eb4d4","url":"https:\/\/sofiadigital.com\/wp-content\/uploads\/2022\/06\/sofia-orange-arrow-right.svg"},{"selector":".elementor-6248 .elementor-element.elementor-element-7472d45e:not(.elementor-motion-effects-element-type-background), .elementor-6248 .elementor-element.elementor-element-7472d45e > .elementor-motion-effects-container > .elementor-motion-effects-layer","style":".elementor-6248 .elementor-element.elementor-element-7472d45e:not(.elementor-motion-effects-element-type-background), .elementor-6248 .elementor-element.elementor-element-7472d45e > .elementor-motion-effects-container > .elementor-motion-effects-layer{--wpr-bg-975b2032-8c84-46b2-ad5d-b079a9a51fc0: url('https:\/\/sofiadigital.com\/wp-content\/uploads\/2022\/06\/sd_oranssibg_kuvituksella.jpg');}","hash":"975b2032-8c84-46b2-ad5d-b079a9a51fc0","url":"https:\/\/sofiadigital.com\/wp-content\/uploads\/2022\/06\/sd_oranssibg_kuvituksella.jpg"}]; const rocket_excluded_pairs = [];</script></head>
    <body>
        <div id="header">Hello Awesome App!</div>
        <div id="app"></div>
    </body>
</html>
What are we doing here? Why are we using an event listener here? The answer: We want to be sure that the HTML page is ready before we start doing anything. After the HTML page is ready, we call our CreateApp-function, which is in the app.js file.
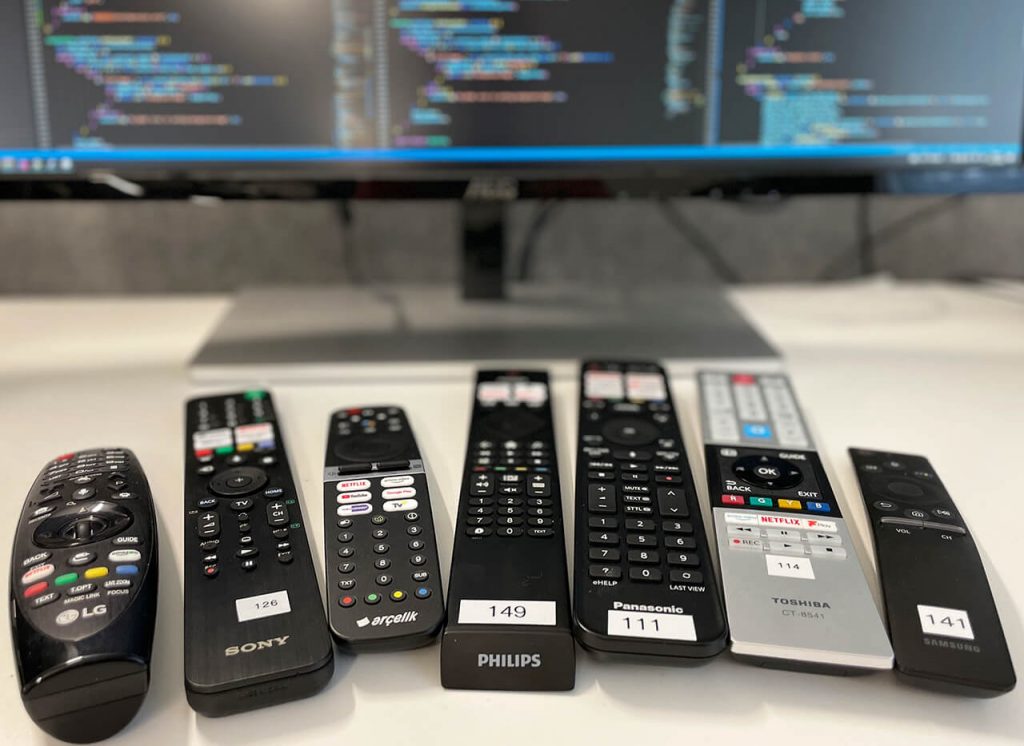
Now, if you’re using Tizen Studio to launch your app, copy the files into the Tizen project, connect the device (mine is a Samsung 2020 model) and launch the app!
When the app is running, press the keys we defined earlier, and you should see the text we defined earlier.
This is a simple example of how to handle key press events in a Smart TV application. From the coding perspective, we haven’t done anything Smart TV platform specific yet.
What should you learn next?
Next steps:
- Learn what mouse events are and where you need those.
- Learn how you can implement mouse events in your Smart TV application.
- Learn what is object-oriented programming and why you need that in Smart TV development.
Actually we have a blog post coming up about mouse events in Smart TV development. Subscribe to our newsletter or follow us in LinkedIn / Twitter to get the latest updates!
About author
 I am currently working at Sofia Digital Ltd as a Scrum Master and software developer. I have four years of experience in Smart TV application development and over 20 in web development.